Food and drinks are a big part of outdoor fun and adventures, which means that a cooler is essential gear. Whether you’re packing sandwiches for a day at the beach or a week’s worth of food and drinks for a camping trip, you’ll want to know how to prepare and pack your cooler to keep food and beverages fresh and cold. Here are our best tips for success along with a video:
1. Prepare Your Cooler
-
Cooler selection – let size be your guide. Whether you own a few coolers or are considering a new purchase, let size dictate your decision as to which cooler to bring on a particular outing. To keep food and drinks cold for the longest amount of time, you should fill your cooler with as little empty space as possible. The rule of thumb for the ratio of ice to food and drinks is 2-to-1. This means that one-third of the total space is available for food and drinks. You can freeze non-carbonated beverages and foods like meat or chicken if you don’t need them on day one, which means that these items can count toward your two thirds ice allotment.

-
Match cooler type to trip type. After size, consider function to determine the best type of cooler for your trip. A hard-sided cooler has a large capacity, is extremely durable and has multi-day ice retention but it’s heavy. A soft-sided cooler is lighter and more portable, and a backpack cooler is ideal for long hikes. Some coolers have tabletops or wheels, others are waterproof, and some have Zipperless™ openings to make it easy to grab a drink or snack with one hand when in the car.

-
Sometimes two coolers are better than one. Every time your cooler is opened during your trip, warm air gets in which lessens the cold inside as well as the frozen state of perishable foods like meats. In instances where you will be with a group of people opening the cooler frequently to grab drinks or snacks, consider bringing two coolers – one for food and one for beverages.

- Pre-chill the cooler. Naturally, the colder the cooler is before you pack it, the longer the ice will last, so ideally, you should try to pre-chill your cooler. Consider pre-chilling the cooler starting a day before your trip. If the cooler doesn’t fit into your fridge, you can fill it with ice and cold water that you pour out right before packing it up.
2. Prep Food and Beverages Too
- Pre-chill food and drinks: The day before your trip, freeze any meat or chicken that isn’t going to be cooked on the first day of the trip. This frozen food can count as ice when you’re calculating the ice to food ratio. Water and other non-carbonated drinks can also be frozen and thawed out as needed. Refrigerate all other food. This will ensure that the ice you fill the cooler with will help keep the contents cold rather than having to chill a warm cooler.
-
The less space the food takes up in the cooler, the more room there is for ice. Try to prepare as much of your food at home. Pre-chop vegetables and portion out food you need such as taking a few eggs vs. the whole carton and putting condiments into smaller containers if you don’t need the whole bottle. Remove excess packaging which takes up space and is probably not watertight. Remember that everything in the cooler is going to get wet when the ice melts so put all food into reusable, watertight containers. Consider using stackable containers to save space.

-
Not all ice is created equal. There are several types of ice you can use in your cooler. You may want to use a blend of several. For example:
- Block ice is a block of ice that is bigger and thicker than ice cubes, so it won’t melt as fast. It can be made at home by freezing water a day or two before the trip in reusable containers or in baking dishes. If you can, make the blocks the same dimension as the bottom of your cooler and up to two inches thick.
- Cubed or crushed ice is ideal for filling in the gaps between food containers and drinks. It can be made at home or bought at the store – note that store bought ice from a commercial freezer is colder than ice made at home.
-
Reusable Ice Packs last longer than ice and won’t get food wet the way melted ice will. They can be purchased as rigid packs and used in lieu of block ice but you’ll also need soft ice packs if you want to fit them around food inside the cooler.

3. Let the Packing Begin
-
It’s all about Layering. Pack a layer of block ice to cover the bottom of the cooler or use frozen ice packs or food. Next, add food in the opposite order that you plan to use it, starting with the last day’s food. The exception to this is soft or delicate foods which you’ll want to put on the top layer to avoid crushing them. In the same way that you’d ice a cake, spread a layer of ice in between each layer of food. Repeat until the cooler is almost full.
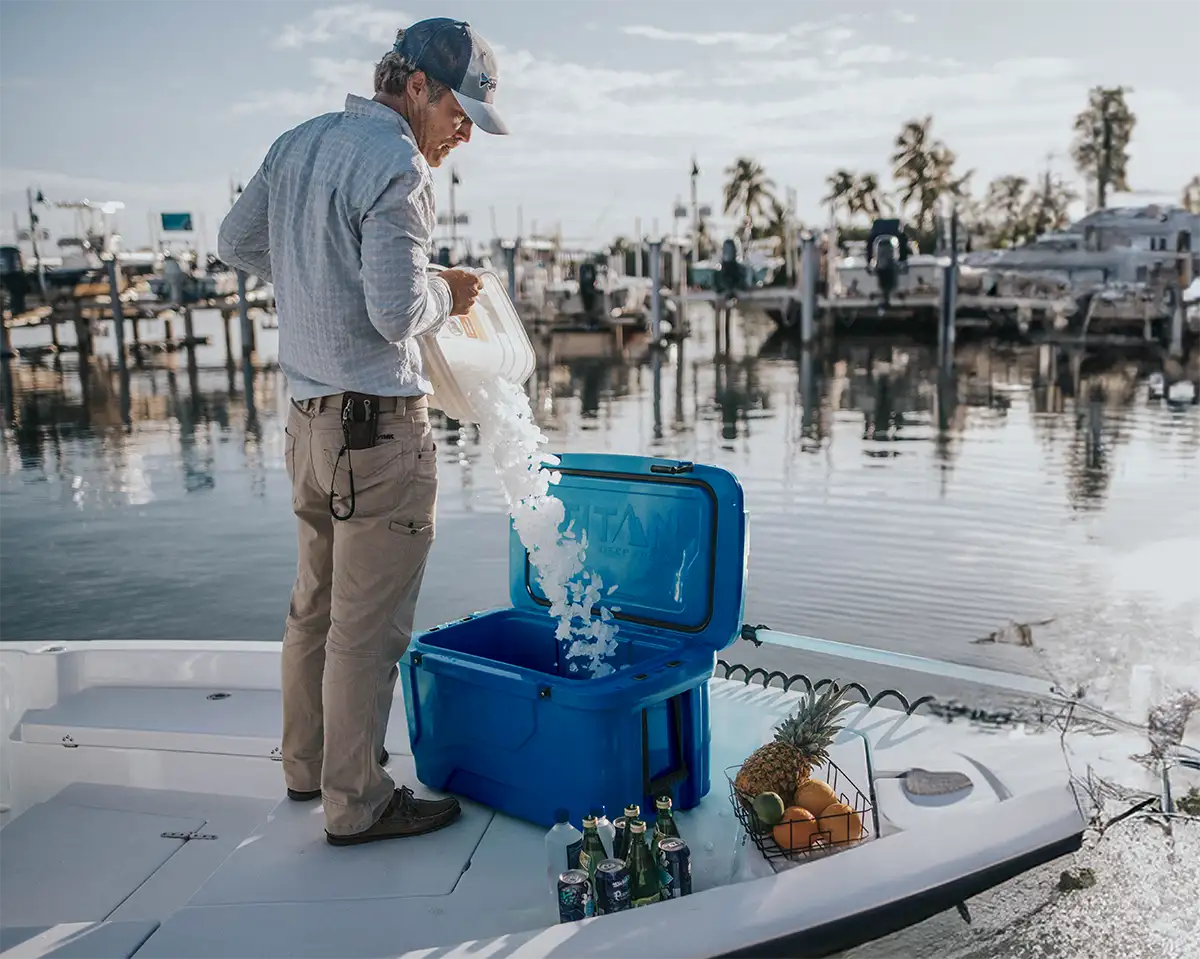
- Air is Your Enemy: As you’re creating layers, fill in pockets of air that speed up ice melting. Fill up as much of this space as you can with ice cubes and/or crushed ice.
- Cover with a Reusable Freezer Sheet: With the cooler packed nearly to the brim, fill the last bit of space under the lid with a reusable freezer sheet. This is a large thin ice pack that will trap the cold and decrease the amount of warm air outside from getting into the cooler when opened. If you don’t have one, reusable ice packs are a good option. You can also use a damp towel folded to fit the top dimensions of the cooler.
4. Ice Retaining Tips for Your Trip
The packing tips presented above will ensure that you start your trip with the best system for keeping food and beverages cold for the longest amount of time. Here are additional suggestions to keep your cooler at its coldest temperatures during your trip.
- Keep Your Cooler in the Shade: If shade isn’t available, cover the cooler with a light colored blanket or towel.
- Retrieve Items Quickly: This is easier to do if you keep your food and beverages organized and separated so they’re quick to locate in the cooler.
- Keep the Cooler Closed and Locked: When not using your cooler, keep it closed and, if it has a latch, use it. This will minimize the amount of cold air that leaks out and warm air that seeps in.
Check out this video:
We hope these tips enhance the enjoyment of your trip. If you have others, please share them here. Happy trails!